Post Storm Roof Damage Assessment
A guide on how to assess roof damage after a storm and what steps to take for insurance claims and repairs.
A guide on how to assess roof damage after a storm and what steps to take for insurance claims and repairs.
Post Storm Roof Damage Assessment
Hey there, homeowner! Just weathered a storm, huh? Whether it was a gentle drizzle that turned into a downpour, a blustery windstorm, or a full-blown hurricane, your roof likely took a beating. It’s not just about the immediate leaks you might spot; storm damage can be sneaky, hiding in plain sight and causing bigger problems down the line. That’s why a thorough post-storm roof damage assessment isn't just a good idea—it's absolutely crucial. This guide is going to walk you through everything you need to know, from initial safety checks to dealing with insurance, and even recommending some tools and products to help you out. Let's get your roof back in tip-top shape!
Immediate Safety First Your Post Storm Roof Check
Before you even think about climbing a ladder or getting too close to your roof, safety has to be your number one priority. Seriously, don't skip this part. After a major storm, there could be downed power lines, unstable structures, or slippery surfaces. Take a deep breath and assess the immediate surroundings of your home. Are there any visible hazards? If you see downed power lines, stay far away and call your utility company immediately. If there's significant structural damage to your home, it might be best to evacuate and call emergency services or a professional contractor to assess the safety of entry.
Once you've determined it's safe to be outside, do a quick perimeter check of your property. Look for large debris, fallen trees or branches, and any obvious signs of damage to your home's exterior, including the roof. From the ground, you can often spot major issues like missing shingles, displaced flashing, or even a sagging roofline. If you have binoculars, now's the time to grab them for a closer look without putting yourself at risk. Remember, if you're uncomfortable or unsure about any aspect of this initial check, it's always better to call a professional roofer. They have the experience and safety equipment to handle these situations.
Ground Level Inspection What to Look For After a Storm
Alright, with safety covered, let's get down to the nitty-gritty of your ground-level inspection. This is where you become a detective, looking for clues that your roof might be compromised. You'd be surprised how much you can learn without ever leaving the ground.
Missing or Damaged Shingles Identifying Storm Damage
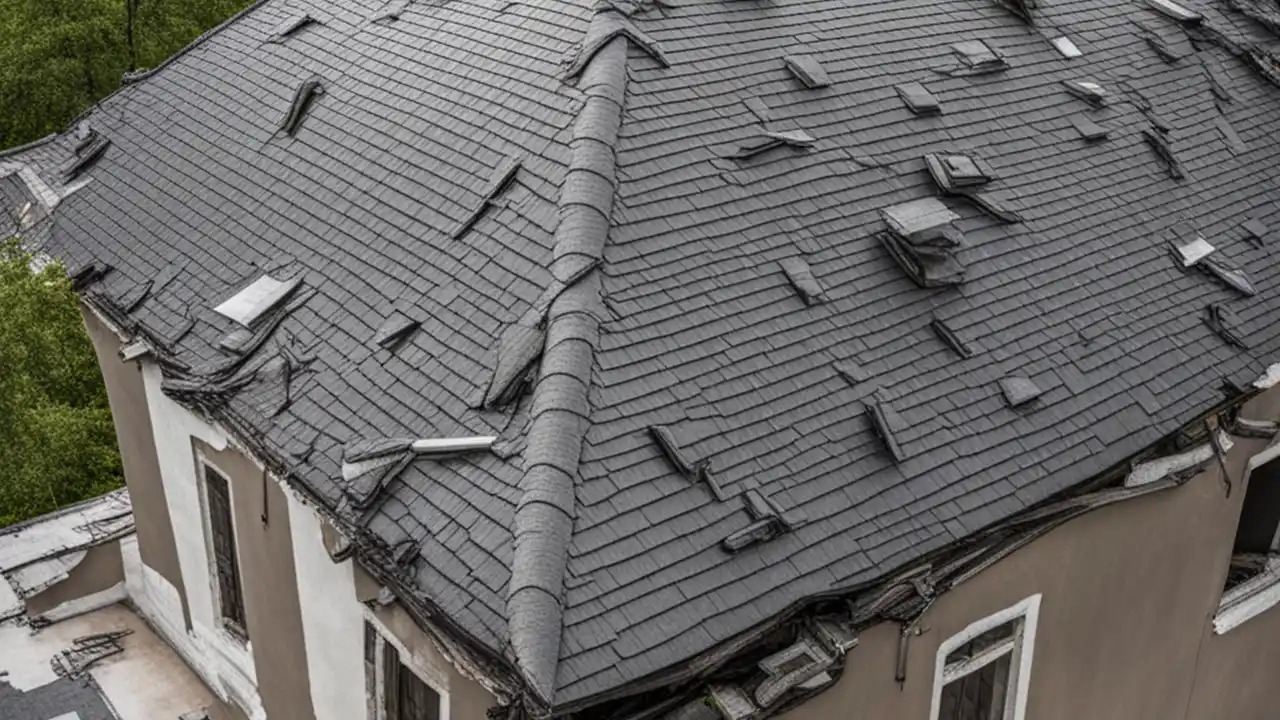
This is probably the most obvious sign of wind damage. Look for shingles that are completely gone, curled, cracked, or lifted. Strong winds can tear shingles right off, especially if they were already older or not properly installed. Even if they're just lifted, that creates an entry point for water. Keep an eye out for shingle granules in your gutters or on the ground around your house. These tiny, sand-like particles are part of your shingles' protective layer, and a significant amount of them can indicate that your roof has taken a beating and its lifespan might be shortened.
Gutter and Downspout Damage Checking for Blockages and Displacements
Your gutters and downspouts are your roof's drainage system, and they're often the first to show signs of storm stress. Look for gutters that are bent, detached, or overflowing. Are they clogged with leaves, twigs, or shingle granules? Blocked gutters can cause water to back up onto your roof, leading to rot, leaks, and even foundation issues. Check if downspouts are still securely attached and directing water away from your home's foundation.
Flashing and Sealant Issues Protecting Vulnerable Roof Areas
Flashing is that thin material, usually metal, installed around chimneys, skylights, vents, and valleys to prevent water penetration. After a storm, flashing can become bent, loose, or even completely detached. Check for any gaps or cracks in the sealant around these areas. These are prime spots for leaks, so pay close attention.
Siding and Exterior Wall Damage Related to Roof Problems
Sometimes, roof damage can manifest on your home's siding or exterior walls. Look for water stains, peeling paint, or even mold growth. These could be indicators of a persistent roof leak that's allowing water to run down the side of your house. Also, check for any impact damage from flying debris that might have hit your walls after bouncing off the roof.
Interior Inspection Signs of a Leaky Roof Inside Your Home
Don't forget to check inside your home! This is where you'll find the most direct evidence of a leak. Look for water stains on ceilings or walls, especially in attic spaces, around light fixtures, or near fireplaces. A musty odor can also be a sign of hidden moisture and mold growth. If you have an attic, grab a flashlight and carefully inspect the underside of your roof deck for any signs of water intrusion, damp insulation, or visible light coming through.
Climbing the Ladder When and How to Safely Inspect Your Roof
Okay, if you're comfortable and have the right equipment, a ladder inspection can give you a much closer look. But seriously, safety first! If you're not confident, or if your roof is steep, high, or wet, call a pro. It's not worth a trip to the emergency room.
Ladder Safety Tips for Homeowners
Always use a sturdy ladder that's tall enough for the job. Make sure it's placed on firm, level ground and extends at least three feet above the edge of your roof. Have someone spot you if possible. Wear non-slip shoes and avoid inspecting your roof when it's wet, windy, or icy. Don't overreach; move the ladder frequently instead. And never step on a damaged part of the roof.
Detailed Roof Surface Examination Identifying Subtle Damage
Once you're safely on the roof (or at least at eye level with it), look for more subtle signs of damage. Check for bruised or dented shingles, which can be caused by hail. These might not look like much, but they can weaken the shingle and lead to premature failure. Look for cracks in the sealant around vents and pipes. Check the condition of your chimney cap and mortar joints. Even small cracks can allow water to seep in. Pay close attention to valleys, where two roof planes meet, as these are common areas for water accumulation and leaks.
Documenting Damage For Insurance Claims and Repairs
This step is absolutely critical for your insurance claim. You need to document everything, and I mean everything. Think of yourself as a forensic photographer.
Taking Photos and Videos Comprehensive Documentation
Use your smartphone or a digital camera to take clear, well-lit photos and videos of all damage. Get wide shots that show the overall area, and then close-ups of specific damage points. Include photos of any debris, missing shingles, damaged gutters, and interior leaks. Date and time stamp your photos if possible. The more evidence you have, the stronger your insurance claim will be.
Creating a Detailed Damage Log What to Include
Alongside your photos, keep a written log. Note down the date and time you observed the damage, a description of what you saw, and where it's located. If you've made any temporary repairs, document those too. This log will be invaluable when you speak with your insurance adjuster and contractor.
Temporary Repairs Preventing Further Damage
While you're waiting for a professional or your insurance adjuster, you might need to make some temporary repairs to prevent further damage to your home. This isn't about fixing the roof permanently, but about stopping the immediate leaks.
Tarping Your Roof A Quick Fix for Leaks
If you have a significant hole or missing section of shingles, tarping your roof is often the best temporary solution. You'll need a heavy-duty tarp, some 2x4s or similar lumber, and screws or nails. Secure the tarp over the damaged area, extending well beyond the leak. Use the lumber to create a frame around the edges of the tarp, and then screw or nail the lumber into the roof deck (not just the shingles) to hold the tarp securely. Make sure the tarp is taut and allows water to drain off, not pool. Be extremely careful when doing this, especially if it's windy or wet.
Patching Small Holes and Cracks Emergency Sealants
For smaller holes or cracks, you can use roofing cement or a high-quality waterproof sealant. Clean the area thoroughly, apply the sealant generously, and if possible, cover it with a small piece of flashing or a spare shingle. These are temporary fixes, so don't rely on them long-term.
Dealing with Insurance Claims Navigating the Process
This can be a headache, but it's a necessary step. Understanding the process will save you a lot of stress.
Contacting Your Insurance Company Initial Steps
As soon as you've assessed the damage and made any necessary temporary repairs, contact your insurance company. Have your policy number ready and be prepared to provide a detailed account of the storm and the damage you've observed. They'll likely assign you a claim number and an adjuster.
Working with an Insurance Adjuster What to Expect
The insurance adjuster will visit your home to inspect the damage themselves. Be present during their inspection and have all your documentation (photos, videos, damage log) ready to share. Point out everything you've found. Don't be afraid to ask questions. Their job is to assess the damage and determine what your policy covers. Sometimes, they might miss things, so your thorough documentation is key.
Understanding Your Policy Deductibles and Coverage
Before the adjuster arrives, review your homeowner's insurance policy. Understand your deductible (the amount you have to pay out of pocket before your insurance kicks in) and what types of storm damage are covered. Some policies have specific clauses for wind, hail, or hurricane damage. Knowing your coverage will help you understand the adjuster's report and any settlement offers.
Hiring a Professional Roofing Contractor Finding the Right Help
Unless you're a seasoned roofer yourself, you'll need a professional to handle the repairs or replacement. Choosing the right contractor is crucial.
Getting Multiple Quotes Why It Matters
Don't just go with the first contractor you call. Get at least three detailed quotes from different reputable roofing companies. This allows you to compare pricing, materials, and proposed solutions. Make sure each quote breaks down the costs for labor, materials, and any additional services.
Checking Credentials and References Ensuring Quality Work
Always check a contractor's credentials. Are they licensed and insured? Ask for proof of both. Request references from previous clients and actually call them. Look for reviews online on platforms like Google, Yelp, or the Better Business Bureau. A reputable contractor will be happy to provide this information.
Questions to Ask Your Roofing Contractor Before Hiring
Beyond credentials, ask about their experience with storm damage repairs, their warranty on labor and materials, and their timeline for the project. How do they handle debris removal? What safety measures do they have in place? A good contractor will communicate clearly and answer all your questions patiently.
Recommended Products and Tools for Post Storm Roof Assessment and Temporary Repair
Having the right gear can make a big difference in your post-storm efforts. Here are a few things you might find useful, along with some specific product recommendations.
Essential Safety Gear for Roof Inspections
- Sturdy Extension Ladder: Look for one with a good weight rating and non-slip feet.
- Work Gloves: Protect your hands from sharp edges and debris.
- Non-Slip Work Boots: Crucial for traction on potentially slippery surfaces.
- Safety Goggles: Protect your eyes from dust and debris.
- Hard Hat: Especially if there's a risk of falling objects.
Documentation Tools for Insurance Claims
- Smartphone or Digital Camera: For high-resolution photos and videos.
- Measuring Tape: To document the size of damaged areas.
- Notebook and Pen: For your detailed damage log.
- Binoculars: For safe ground-level inspection of hard-to-see areas.
Temporary Repair Materials and Products
When it comes to temporary repairs, you want materials that are durable and easy to apply in an emergency. Here are some recommendations:
Heavy-Duty Tarps
- Product Recommendation: Blue Tarp Heavy Duty Waterproof Tarpaulin (various sizes)
- Use Case: Ideal for covering large sections of missing shingles or significant holes in your roof.
- Comparison: These are generally made from woven polyethylene, offering good tear resistance and UV protection. Look for tarps with reinforced grommets for secure fastening.
- Price Range: $20 - $100+ depending on size and thickness.
Roofing Cement and Sealants
- Product Recommendation: Henry 208 Wet Patch Roof Cement or Flex Seal Liquid Rubber Sealant Coating
- Use Case: For patching small cracks, sealing around loose flashing, or temporarily reattaching a lifted shingle. Wet Patch is great because it can be applied to wet surfaces, which is often the case after a storm. Flex Seal offers a liquid rubber coating that can seal larger, irregular areas.
- Comparison: Roofing cement is a traditional, asphalt-based product, very effective for small, localized repairs. Liquid rubber sealants offer more flexibility and can cover a wider area, but might require multiple coats.
- Price Range: Roofing Cement: $15 - $30 per gallon. Flex Seal: $20 - $50 per can/gallon.
Plastic Sheeting and Duct Tape
- Product Recommendation: Heavy Duty Polyethylene Sheeting (6 mil or thicker) and Gorilla Tape Waterproof Duct Tape
- Use Case: For covering smaller, localized leaks in a pinch, especially if you don't have a tarp. The plastic sheeting can be taped down with strong, waterproof duct tape.
- Comparison: This is a very temporary, last-resort solution. While not as robust as a tarp, it's easy to apply and can buy you some time. Gorilla Tape is known for its strong adhesive and weather resistance, making it superior to standard duct tape for this purpose.
- Price Range: Plastic Sheeting: $10 - $30 per roll. Gorilla Tape: $8 - $15 per roll.
Fasteners and Tools
- Product Recommendation: Roofing Nails (1.25-inch galvanized), Cordless Drill/Driver, Utility Knife
- Use Case: For securing tarps with lumber, cutting plastic sheeting, or making minor adjustments.
- Comparison: Galvanized roofing nails are rust-resistant and have a wide head for better holding power. A cordless drill is invaluable for quick and easy fastening.
- Price Range: Roofing Nails: $10 - $20 per pound. Cordless Drill: $50 - $200+. Utility Knife: $5 - $15.
Long Term Solutions and Prevention Protecting Your Investment
Once the immediate crisis is over and repairs are underway, it's time to think long-term. How can you prevent this much damage from happening again?
Regular Roof Maintenance The Key to Longevity
The best defense is a good offense. Regular roof maintenance can significantly extend the life of your roof and help it withstand future storms. This includes annual inspections (professional or DIY), cleaning gutters, trimming overhanging branches, and addressing small issues before they become big problems. A well-maintained roof is a resilient roof.
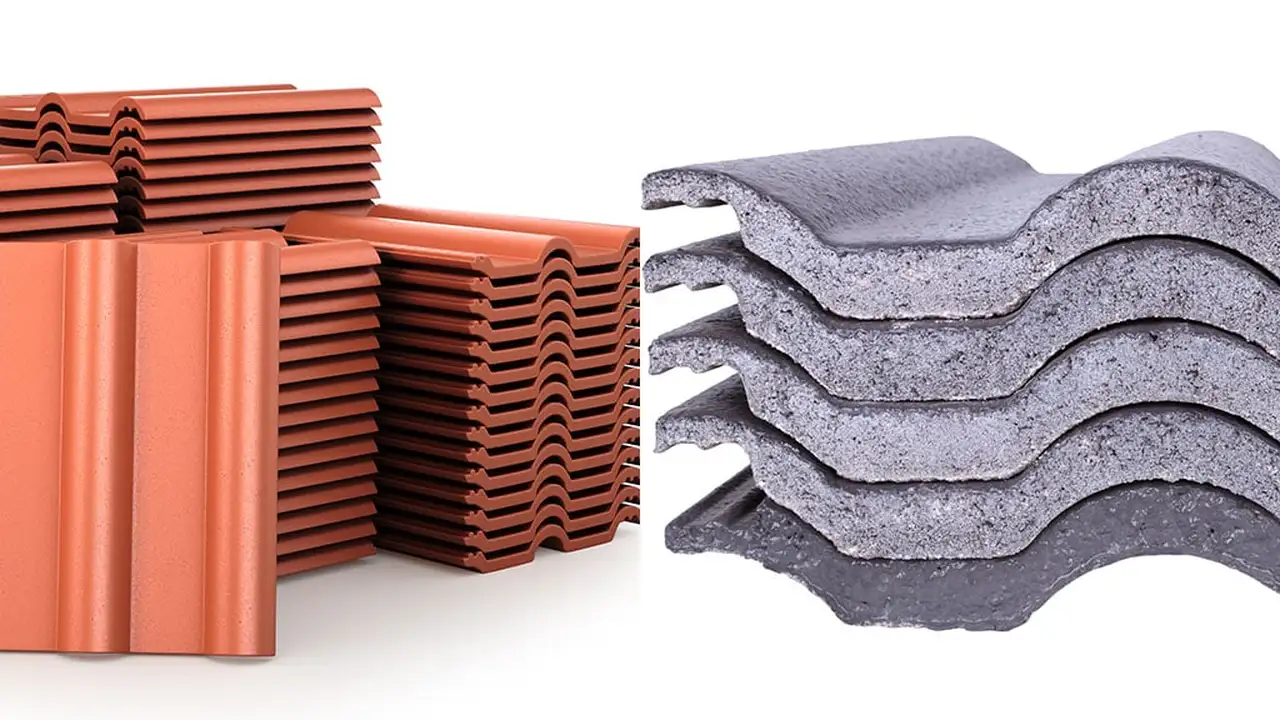
Upgrading to Storm Resistant Roofing Materials
If your roof is older or sustained significant damage, consider upgrading to more storm-resistant materials during replacement. For example, in hurricane-prone areas, impact-resistant shingles or metal roofing can offer superior protection. In hail-prone regions, Class 4 impact-resistant shingles are a smart investment. These materials might have a higher upfront cost, but they can save you a lot of money and headaches in the long run, and sometimes even qualify you for insurance discounts.
Improving Roof Ventilation and Drainage
Proper ventilation helps regulate attic temperature and moisture, which can prevent premature aging of your roofing materials. Good drainage, through well-maintained gutters and downspouts, ensures water is directed away from your home, reducing the risk of leaks and foundation issues. Consider adding gutter guards to prevent clogs from leaves and debris.
Professional Roof Inspections Annual Check-ups
Even if you're diligent with your DIY checks, a professional roof inspection every few years, or after any significant weather event, is highly recommended. Professionals can spot subtle issues that you might miss and have specialized tools like drones or thermal cameras to detect hidden problems. Think of it like a regular check-up for your car – it keeps everything running smoothly and catches potential issues early.
So, there you have it. Dealing with post-storm roof damage can feel overwhelming, but by following these steps, you can systematically assess the situation, protect your home from further harm, and navigate the repair and insurance process with confidence. Stay safe out there, and remember, your roof is your home's first line of defense!
:max_bytes(150000):strip_icc()/277019-baked-pork-chops-with-cream-of-mushroom-soup-DDMFS-beauty-4x3-BG-7505-5762b731cf30447d9cbbbbbf387beafa.jpg)