The Roof Installation Process Step by Step
A detailed guide to the roof installation process, from old roof removal to final inspection, for homeowners.

A detailed guide to the roof installation process, from old roof removal to final inspection, for homeowners.
The Roof Installation Process Step by Step Your Comprehensive Guide
So, you're looking at a new roof, huh? Whether it's a fresh build or a much-needed replacement, understanding the roof installation process can feel a bit overwhelming. But don't sweat it! We're going to walk you through every single step, from tearing off the old stuff to that final, satisfying inspection. Knowing what to expect helps you stay informed, ask the right questions, and ensure you're getting a top-notch job. This isn't just about slapping some shingles on; it's about building a durable, protective shield for your home that will last for decades. Let's dive in!
Phase 1 Pre-Installation Preparations and Planning Your Roofing Project
Getting Ready for Your New Roof What to Expect Before Day One
Before any hammers start swinging, there's a crucial preparation phase. This is where your roofing contractor shines, but it's also where you, as the homeowner, play a vital role. First off, you'll have had your initial consultation and received a detailed estimate. This estimate should break down everything: materials, labor, permits, and a timeline. Don't be shy about asking for clarification on anything you don't understand. A good contractor will be happy to explain.
Permits and Regulations Navigating Local Roofing Codes
One of the first things your contractor should handle is securing the necessary permits. Roofing projects, especially replacements, almost always require a permit from your local building department. This isn't just red tape; it ensures the work meets local building codes and safety standards. Your contractor should be familiar with these regulations, but it's always good to confirm they've taken care of this. Without proper permits, you could face fines or even be forced to redo the work.
Material Delivery and Storage Organizing Your Roofing Supplies
Once permits are in hand, your chosen roofing materials will be delivered. This usually happens a day or two before the actual work begins. Expect a large truck and a significant pile of shingles, underlayment, flashing, and other supplies. Your contractor will coordinate the delivery and advise on the best place to store these materials – typically on your driveway or a designated area that's easily accessible but out of the way. Make sure there's enough space and that the area is clear. For example, if you're getting GAF Timberline HDZ shingles, a common choice in the US, you'll see bundles of these arrive, along with rolls of GAF FeltBuster synthetic underlayment and various flashing components.
Protecting Your Property Safeguarding Landscaping and Outdoor Items
This is a big one! Roofing work can be messy and potentially damaging if precautions aren't taken. Before the crew arrives, move any outdoor furniture, grills, potted plants, and decorative items away from the house. Your contractor should place tarps around the perimeter of your home to catch debris, nails, and old roofing materials. It's also a good idea to cover any delicate landscaping or shrubs that are close to the house. If you have a satellite dish or solar panels, discuss with your contractor how they will be handled – they might need to be temporarily removed and reinstalled.
Phase 2 Old Roof Removal The Tear-Off Process
The Initial Tear-Off Safely Removing Existing Roofing Materials
Day one usually kicks off with the tear-off. This is exactly what it sounds like: removing the old roof. The crew will start by stripping off all existing shingles, underlayment, and flashing down to the roof deck. This is often the loudest and messiest part of the job. Expect a lot of noise and debris. Most contractors use a large dumpster or a specialized trailer to collect the old materials, which will be positioned as close to the house as possible for efficiency.
Inspecting the Roof Deck Assessing for Damage and Repairs
Once the old roofing is gone, the bare roof deck is exposed. This is a critical moment for inspection. The crew will carefully examine the plywood or OSB sheathing for any signs of damage, rot, or weakness. Water damage, especially around vents, chimneys, and valleys, is common. If damaged sections are found, they will need to be replaced. This is an extra cost, but it's absolutely essential for the structural integrity of your new roof. For instance, if you have a 4x8 foot section of plywood that's rotted, it will be cut out and replaced with new, structurally sound sheathing. This ensures your new roof has a solid foundation.
Addressing Fascia and Soffit Issues Repairing Eaves and Overhangs
While the roof deck is exposed, it's also a good time to inspect and repair any issues with the fascia and soffit. The fascia is the board running along the edge of your roof, directly supporting the gutters. The soffit is the underside of your roof's overhang. Both are crucial for protecting your home from pests and moisture. If they're rotted or damaged, your contractor should address these repairs before proceeding with the new roof installation.
Phase 3 New Roof Installation Building Your Home's Protective Layer
Installing Drip Edge and Ice and Water Shield Essential Protection
With a clean, sound roof deck, the installation of new materials begins. First up is the drip edge, a metal flashing installed along the edges of the roof. It helps direct water off the roof and into the gutters, protecting the fascia and preventing water from seeping under the roofing materials. Next comes the ice and water shield. This is a self-adhering, waterproof membrane applied to vulnerable areas of the roof, such as eaves, valleys, and around penetrations (chimneys, vents). It provides an extra layer of protection against ice dams and heavy rain. In colder climates, building codes often mandate its installation along the eaves. For example, CertainTeed WinterGuard is a popular ice and water shield product known for its strong adhesion and waterproofing capabilities.
Underlayment Application The Foundation for Your Shingles
After the ice and water shield, a layer of underlayment is installed over the entire roof deck. This acts as a secondary barrier against moisture and helps protect the roof deck during installation. Traditionally, felt paper (tar paper) was used, but synthetic underlayments are now very popular due to their superior tear resistance, lighter weight, and better water resistance. Products like Atlas Summit 60 or Owens Corning ProArmor are excellent examples of synthetic underlayments that offer enhanced protection and durability compared to traditional felt.
Flashing Installation Protecting Vulnerable Roof Areas
Flashing is critical for preventing leaks around any interruptions in your roof's surface. This includes chimneys, skylights, vent pipes, and valleys. Different types of flashing are used for different areas: step flashing for walls, valley flashing for roof valleys, and counter flashing for chimneys. These metal pieces are carefully installed and sealed to ensure a watertight seal. Proper flashing installation is one of the most important aspects of a leak-free roof, and it's where an experienced roofer truly makes a difference.
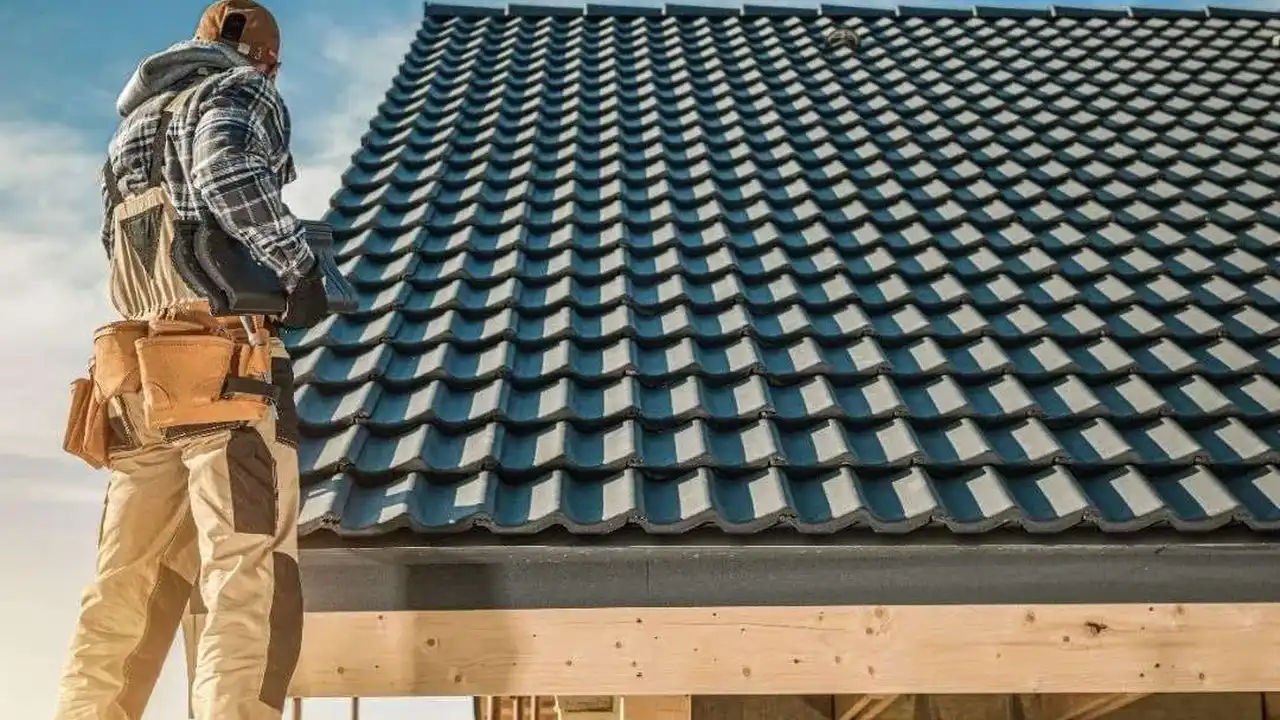
Shingle Installation Laying the Primary Roofing Material
Now for the main event: laying the shingles! The crew will start at the bottom edge of the roof (the eaves) and work their way up to the ridge. They'll use starter shingles along the eaves and rake edges to ensure a clean, straight line and proper sealing. Each shingle is carefully aligned and fastened with roofing nails, following the manufacturer's specifications for nail placement and quantity. Overlapping shingles create a watertight barrier. The pattern and exposure of the shingles are crucial for both aesthetics and performance. For instance, if you're using Owens Corning Duration shingles, the SureNail Technology strip ensures consistent nail placement and superior wind resistance.
Popular Shingle Types and Their Applications
- Asphalt Shingles: The most common choice in the US and increasingly popular in Southeast Asia. They are affordable, versatile, and come in a wide range of colors and styles.
- 3-Tab Shingles: Basic, flat appearance, generally the most economical. Good for budget-conscious projects.
- Architectural (Laminate) Shingles: Thicker, multi-layered, offering a dimensional look that mimics wood shakes or slate. Excellent durability and curb appeal. Brands like GAF Timberline HDZ, Owens Corning Duration, and CertainTeed Landmark Pro are top-tier architectural shingles.
- Designer (Luxury) Shingles: Heaviest and most expensive, designed to replicate natural slate or cedar shakes with enhanced aesthetics and performance.
- Metal Roofing: Gaining popularity for its longevity, energy efficiency, and modern aesthetic. Available in panels or shingles.
- Standing Seam Metal: Long, vertical panels with raised seams. Very durable, low maintenance, and excellent for shedding water. Products like Classic Metal Roofing Systems' Oxford Shingle or standing seam panels from manufacturers like McElroy Metal are great options.
- Metal Shingles: Stamped to resemble traditional shingles, slate, or tile. Offers the benefits of metal with a more conventional look.
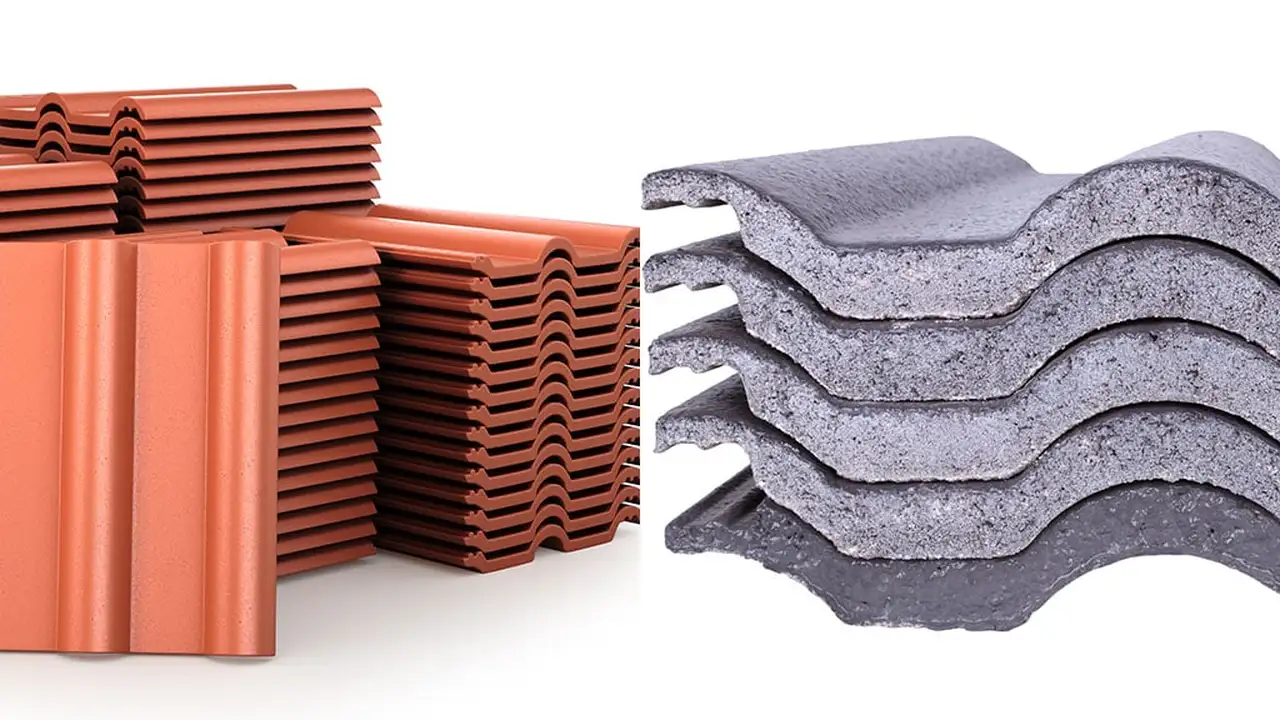
- Tile Roofing (Clay and Concrete): Very durable, fire-resistant, and excellent for hot climates. Common in Southeast Asia.
- Clay Tiles: Classic, Mediterranean look. Excellent longevity. Brands like Ludowici or Boral Roofing offer high-quality clay tiles.
- Concrete Tiles: More affordable than clay, very durable, and available in various profiles and colors.
- Wood Shakes and Shingles: Natural, rustic look. Requires more maintenance.
- Synthetic/Composite Roofing: Made from recycled materials, mimicking slate or wood. Durable and eco-friendly. Brands like DaVinci Roofscapes offer composite shingles that look like slate or cedar but are more durable and fire-resistant.
Ridge and Hip Cap Installation Finishing the Roof
As the shingle installation progresses, the crew will reach the ridge (the peak of the roof) and the hips (angled ridges). These areas require special cap shingles that are designed to cover the ridge and hip lines, providing a finished look and protecting these vulnerable points. These cap shingles are often thicker and more flexible than standard shingles. Proper ventilation is also often integrated into the ridge cap, using a ridge vent system to allow hot, moist air to escape the attic.
Ventilation Systems Ensuring Proper Airflow and Energy Efficiency
Proper attic ventilation is absolutely crucial for the longevity of your roof and the energy efficiency of your home. Without adequate ventilation, heat and moisture can build up in the attic, leading to premature shingle aging, wood rot, and higher energy bills. Your contractor will install various ventilation components, which might include:
- Ridge Vents: Installed along the peak of the roof, allowing hot air to escape.
- Soffit Vents: Located under the eaves, allowing cooler air to enter the attic.
- Gable Vents: Installed on the gable ends of the house.
- Static Vents (Box Vents): Individual vents placed on the roof surface.
- Powered Vents: Electric fans that actively pull air out of the attic.
A balanced ventilation system, with equal intake (soffit) and exhaust (ridge or static) ventilation, is key. For example, an Air Vent Inc. ShingleVent II ridge vent combined with adequate soffit intake ensures optimal airflow.
Phase 4 Post-Installation Cleanup and Final Inspection
Thorough Cleanup Removing Debris and Nails
Once the last shingle is laid, the crew will undertake a thorough cleanup. This involves removing all old roofing materials, packaging, and any other debris from your property. A critical part of this cleanup is using a magnetic roller to pick up any stray nails from your lawn, driveway, and surrounding areas. This prevents flat tires and injuries. A good contractor will leave your property as clean, if not cleaner, than they found it.
Final Walk-Through and Inspection Ensuring Quality and Satisfaction
Before the crew packs up, your contractor should conduct a final walk-through with you. This is your opportunity to inspect the finished product, ask any remaining questions, and ensure you're completely satisfied with the work. Look for consistent shingle alignment, proper flashing, and a clean job site. Don't hesitate to point out anything that doesn't look right. A reputable contractor will address any concerns promptly. They should also provide you with information on your new roof's warranty – both the manufacturer's warranty on the materials and their own warranty on the workmanship.
Understanding Your New Roof Warranty Protecting Your Investment
Your new roof will come with at least two types of warranties: a material warranty from the shingle manufacturer and a workmanship warranty from your roofing contractor. Material warranties can range from 20 years for basic 3-tab shingles to 50 years or even lifetime for architectural and designer shingles. Workmanship warranties typically last anywhere from 5 to 25 years. Make sure you understand what each warranty covers, what voids it, and how to file a claim if needed. For example, GAF offers a Golden Pledge Warranty through certified contractors, which covers both materials and workmanship for an extended period, providing excellent peace of mind.
Recommended Products and Their Applications A Closer Look
Asphalt Shingles Top Brands and Their Features
- GAF Timberline HDZ: These are incredibly popular architectural shingles. They offer a high-definition look, excellent durability, and come with GAF's StrikeZone nailing area, which makes installation faster and more accurate, leading to better wind resistance. They are widely available in both the US and parts of Southeast Asia. Expect pricing in the range of $100-$150 per square (100 sq ft) for materials. Ideal for homeowners seeking a balance of aesthetics, performance, and value.
- Owens Corning Duration: Another leading architectural shingle, known for its SureNail Technology. This woven fabric strip in the nailing area provides exceptional grip, making the shingles highly resistant to wind uplift. They offer a wide array of colors and are a strong competitor to GAF. Material costs are similar to GAF Timberline HDZ. Great for areas prone to high winds.
- CertainTeed Landmark Pro: These are heavier, two-piece laminated shingles designed to replicate the look of cedar shakes. They offer enhanced durability and a wider color palette. They are a premium architectural shingle, often slightly more expensive than GAF or Owens Corning, ranging from $120-$180 per square. Perfect for homeowners prioritizing a robust, aesthetically pleasing roof with a long lifespan.
Metal Roofing Durable and Energy-Efficient Options
- Classic Metal Roofing Systems Oxford Shingle: This is an aluminum shingle designed to look like traditional asphalt shingles or slate, but with the longevity and benefits of metal. It's lightweight, energy-efficient (reflects solar heat), and comes with a lifetime warranty. Material costs can be significantly higher than asphalt, often $300-$600+ per square, but the lifespan (50+ years) and low maintenance often justify the initial investment. Excellent for homeowners looking for a 'forever roof' with a traditional appearance.
- McElroy Metal Max-Rib Ultra: A popular choice for standing seam metal roofing, offering robust protection and a sleek, modern look. These panels are highly durable, fire-resistant, and excellent for shedding water and snow. Pricing varies widely based on gauge and finish but generally falls in the $250-$500+ per square range for materials. Ideal for contemporary homes or those in areas with heavy snow or rain.
Tile Roofing Traditional Beauty and Resilience
- Boral Roofing Concrete Tiles: Boral is a major manufacturer of concrete roof tiles, offering a vast selection of profiles (flat, low profile, high profile) and colors. Concrete tiles are extremely durable, fire-resistant, and excellent for hot climates due to their thermal mass. They are also very common in Southeast Asia. Material costs typically range from $150-$300 per square. A great choice for Mediterranean or Spanish-style homes, or any home in a hot climate needing a long-lasting, low-maintenance roof.
- Ludowici Clay Tiles: For the ultimate in traditional elegance and longevity, Ludowici clay tiles are a premium option. Handcrafted and available in a wide range of custom colors and profiles, they are incredibly durable and can last for over a century. However, they are also very heavy and expensive, often exceeding $800-$1500+ per square for materials alone. Best suited for luxury homes or historic restorations where authenticity and unparalleled durability are paramount.
Synthetic Roofing Modern Alternatives
- DaVinci Roofscapes Composite Shingles: These synthetic shingles are engineered to perfectly replicate the look of natural slate or cedar shakes, but without the maintenance issues. They are made from virgin resins, UV and thermal stabilizers, and a highly durable polymer. They are lightweight, impact-resistant, fire-resistant, and come with a lifetime limited warranty. Material costs are comparable to high-end metal or premium tile, often $400-$800+ per square. An excellent choice for homeowners who want the aesthetic of natural materials with superior performance and less maintenance.
Comparing Roofing Materials A Quick Overview
Cost vs Longevity Understanding Your Investment
When choosing a roofing material, it's a balance between upfront cost and long-term value. Asphalt shingles are the most affordable initially, typically lasting 20-30 years. Metal roofs, while more expensive upfront, can last 50-70 years, often making them more cost-effective over their lifespan. Tile roofs offer similar longevity to metal, sometimes even longer, but also come with a higher initial price tag. Synthetic options bridge the gap, offering enhanced durability over asphalt at a mid-to-high price point.
Aesthetics and Curb Appeal Matching Your Home's Style
The look of your roof significantly impacts your home's curb appeal. Asphalt shingles offer a wide range of colors and styles, from basic 3-tab to dimensional architectural looks. Metal roofs provide a sleek, modern, or even rustic farm-style appearance depending on the profile. Tile roofs evoke a classic, Mediterranean, or Spanish aesthetic. Wood shakes offer a natural, rustic charm. Synthetic options can mimic any of these, providing versatility without the drawbacks of natural materials.
Performance in Different Climates Choosing Wisely
Your local climate plays a huge role in material selection. In hot, sunny climates (like much of Southeast Asia or the southern US), materials that reflect heat, like light-colored metal or tile, are excellent for energy efficiency. In areas with heavy rain, materials that shed water efficiently, such as metal or tile, are advantageous. For regions with high winds, architectural asphalt shingles with strong nailing zones, or properly installed metal roofs, offer superior resistance. In colder climates, materials that can withstand freeze-thaw cycles and heavy snow loads are crucial.
After the Roof Is Done What Next
Regular Maintenance Tips for a Long-Lasting Roof
Just because your new roof is installed doesn't mean you can forget about it. Regular maintenance is key to maximizing its lifespan. This includes annual inspections (either DIY from the ground with binoculars or by a professional), keeping gutters clean, trimming overhanging branches, and promptly addressing any minor repairs. Catching small issues early can prevent them from becoming costly problems down the line.
Understanding Your Home's New Protection Enjoying Peace of Mind
With your new roof in place, you've invested in your home's primary defense against the elements. Take a moment to appreciate the fresh look and the peace of mind that comes with knowing your home is well-protected. This comprehensive guide should give you a solid understanding of the entire process, from start to finish. Enjoy your beautiful, durable new roof!
:max_bytes(150000):strip_icc()/277019-baked-pork-chops-with-cream-of-mushroom-soup-DDMFS-beauty-4x3-BG-7505-5762b731cf30447d9cbbbbbf387beafa.jpg)